Welcome to the Best Practice resources for Race Organisers…
Help videos
- VeloViewer WorldTour Package AIOCC General Assembly 2024 Presentation
- 1. VeloViewer WorldTour Package Race Organiser Overview
- 2. VeloViewer WorldTour Package Race Organiser User Admin Overview
- 3. VeloViewer WorldTour Package Race Organiser Race Hub Overview
- 4. VeloViewer WorldTour Package Route Organiser Race Details Overview
- 5. VeloViewer WorldTour Package Race Organiser Waymarkers Overview – please note this refers to levels 0-9 which have now been updated, see (ii) below.
- 6. VeloViewer WorldTour Package Race Organiser Waymarker Options
Guides
Initial Set-up
- A suitable representative of the Race Organiser should get in touch with worldtour@veloviewer.com providing your Race Organiser name and a list of AIOCC registered races.
- Rachel or Ben at VeloViewer (VV) will get back in touch asking for a few more specific details.
- A Race Organiser will be set up with an individual Race Hub containing placeholders for all of your AIOCC registered races.
- The nominated ‘admin’ person within the Race Organisation will then be able to add other users to the Race Hub. There is no limit to the number of users.
Race Preparation
It is critical that route accuracy is as good as we can possibly make it. The safety of the riders and race convoy is massively improved when the riders have the exact routes on their head units and in the Live app in the cars/motos. The teams will be looking for hazards through built up areas to relay to their riders and the riders will be looking at the maps on their head units on descents and other stages of the race to gauge their speeds and road position. Any mapping errors/deficiencies may have major safety implications for riders and race vehicles. OSM based mapping using a tool like RideWithGPS provides that best quality.
We realise that you will have your own existing processes for creating files which have been adequate for running your race, now that VeloViewer is working with so many race organisers, we need to implement quality and safety standards. If your route files aren’t up to the required quality, we will ask you for new versions plotted out with a more suitable tool. We don’t do this to be difficult, we do this because it is a critical rider safety issue. More on Race Route Quality…
When sending GPX/KMZ files, please DO NOT send the following – the quality will not be good enough and we will not be able to process it:
- GPS recordings (from a vehicle or bike). The routes will never follow the road to the accuracy needed for VeloViewer to work effectively for teams and other stakeholders. Key areas (junctions, descents, built-up areas) are always messy. Files MUST be created by plotting out the route, preferably using RideWithGPS.
- Files with reduced number of data points. Always ensure exported files include all available data points.
- Routing tools to avoid: OpenRunner (always lacks required number of data points); Garmin Basecamp unless you install the OSM maps (Garmin’s roads don’t line up with reality compared to OSM based mapping tools); Some national mapping services e.g. UK’s Ordnance Survey (like Garmin, these tools’ roads don’t match up with actual roads)
(i) Race Routes
- VV will add top level race information from the UCI calendar to your Race Hub and the race(s) will show under Planned Races until the race route files are received.
- Race Organisers will create provisional race route files (type GPX/KMZ). Our preferred software is RideWithGPS as the route exports are higher quality and it is more reliable.
- If you want to stay in control of any route changes in VV whilst you are in the iterative stage of planning, recons and amending a route (even importing or adding waymarkers) then you can use the Training Camps functionality. Using Training Camps is optional and, if you prefer, you can send the GPX files to VV and it will be added immediately to the official UCI race.
- Race Organiser can do recons using VV Live app and revise routes as required. The route change must always be done in the mapping tool used for the original route and then the GPX file uploaded in to Strava if using the Training Camp option else sent to VV for processing.
- If you are using Training Camps then once you are satisfied that the routes are stable download and send VV the GPX file(s).
- VV will upload the routes to the official UCI race then the Race Organiser can import any waymarkers from the Training Camp or from a previous race. It is then advised to delete the routes from the Training Camp (if used) so you do not inadvertently add/update waymarkers on the incorrect version.
- Any route changes from this point need to be made to your own version (e.g. RideWithGPS) and then send the updated GPX/KMZ files to VV and we will upload the changes. This is so we can track any changes in the Notes Log and share with the Teams.
(ii) Adding Waymarkers (POIs)
- Race Organisers should add waymarkers during the race preparation in VeloViewer as early as possible, ideally before the routes are available to the Teams. This can be done when viewing a route in the Race Hub or, when on the road, in the Live App. Waymarkers can also be imported from a previous race that followed part/all of the route, as long as you have access to it.
- When a race organiser is using VeloViewer (or when some waymarker information is provided in GPX/KMZ files by the organiser) then a “level” is applied to each waymarker which determines whether that waymarker is shared with teams participating in the race as well as providing an importance/level to each waymarker. If a waymarker’s level is one of E, H1, H2, H3 or Info then it is shared (read-only) with the teams. Levels R1 and above are only visible to the race organiser.
Suggested use of levels for Race Organiser:
-
- E: Essential race info. e.g. Sprint/Bonus, KOM (HC/1/2/3/4), KOM start, Pavé/Gravel start/end.
- H1: A red hazard – Any area or situation on the course that may present an elevated level of risk to riders, even when standard safety measures are in place. Within VeloViewer, these areas are automatically indicated in red. Examples may include unexpected obstacles appearing after a corner, surfaces that are unsuitable for road bikes, sections of traffic infrastructure in the final three kilometres requiring extra caution, or sudden transitions where the roadway narrows. All significant hazards should be addressed on site, ideally with the assistance of marshals, and noted via race radio for rider awareness. For a typical 160-kilometre race, it is advisable that the number of such significant hazards be limited to approximately 5, where practicable.
- H2: An orange hazard – A potential risk that requires the attention of the race organizer. Typical examples include rail crossings, road furniture in descents or urban areas, tunnels and bridges with narrowing sections, steep technical switchbacks, speed bumps within the final five kilometres, and cattle grids. In VeloViewer, these hazards are automatically displayed in orange. It is recommended that the number of medium impact hazards in a 160 kilometres race does not exceed 15. These hazards should be clearly signaled on site and must be communicated through the race radio.
- H3: Yellow hazards are defined as any obstacle or route feature that may interfere with the smooth conduct of the race but does not constitute a high impact hazard. Examples include raised pedestrian crossings or speed bumps located far from the finish, changes in road surface, or traffic infrastructure situated on wide and straight sections of road. The primary purpose of identifying these hazards is to support pre-race preparation. This information is shared with the teams, who may decide whether or not to display it. Normally, yellow hazards do not need to be communicated via the race radio if adequate on-site signaling is in place. Nevertheless, organizers are encouraged to identify and mark all potential issues within this category to ensure thorough preparation and safe race operations.
- Info: Other info that could be useful to the Teams. e.g. Waste/Feed zones, PPO, Anti-doping, Parking.
- R1 to R6: Race Organiser only – All other features, Normal junctions, Info for marshals, logistics for signage/barriers, other information for Race Radio.
- UCI: Incidents – Available to race organiser and UCI/SafeR
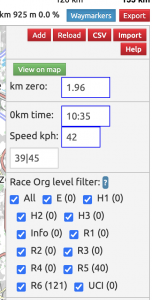
- The levels descriptions (detailed above) are also available in the Race Hub in the Waymarker panel by clicking the Question Mark (?) icon alongside the filter. Details of all Waymarker types is available on the Help button.
- It is expected that teams will create their own copies of the Feed/Bidon/Technical/Waste zones as they will want to add staff names to the descriptions so having them as level R1 allows the teams to easily filter them out in the Race Hub and Live app.
- An optional description can be set which is also shared with the teams (on level E to Info waymarkers). You can also set a private notes field against any of your waymarkers which is only visible within your organisation to help with race logistics, e.g. signage/marshalling.
- Waymarker options can be used for those displaying the Options text
- For climbs, teams have fed back that they would like the climb name entered into the description field on the KOM waymarker. Also, if you have pavé/gravel sectors which are named/numbered then please add that information to the description to the pavé/gravel start waymarker.
(iii) Making your routes available to Teams
- When you are ready the race routes can be shared with the Teams. This could be straight away or it can be scheduled for a specific date (e.g. the route presentation).
- Teams often want to begin their preparation many months before the race and expect some route changes to be made when necessary so the earlier the routes can be shared with the teams the better.
- Once race routes have been made available to Teams, any further changes to the routes will still need to be processed by VeloViewer. Any changes will be listed in the Notes Log so it is clear to Teams what the changes are.
- You can continue to add/edit your waymarkers once the routes are shared to the teams.
(iv) Making your routes available to Media
- Some Media organisations use VeloViewer so their commentators and analysts can prepare for race coverage.
- VV will seek permission from the Race Organiser when processing the files.
- Only where explicit permission has been given by the Race Organiser are routes made visible to the media users.
- Where permission is given, it is suggested that this date is set 14 days before the race commences but it can be set for any date specified.
(v) Exports for Road Books
- The following data can be exported:
- A CSV file with waymarkers along with expected arrival times for three given speeds for use in the race schedule.
- Profiles of the climbs.
- Maps.
- The GPX/TCX files with all waymarkers.
Further help
For any further help then please email worldtour@veloviewer.com