The VeloViewer Live app is part of the VeloViewer WorldTour package and is used when on the road to view the upcoming route, waymarkers, and weather. It can also be used on recons before the race or by safety vehicles ahead of the race who can add new waymarkers for unexpected hazards to share with all stakeholders. Live locations of all the organisation’s users can be shared and viewed.
- Install and troubleshooting
- Live location sharing
- Recon mode / adding waymarkers
- Settings
- Race control centre
2 very important points regarding the device you use to run the Live app:
- Needs to be GPS enabled. Most Android tablets have GPS built in (but worth double checking) and all Apple/Android phones. Cellular iPads have GPS built in but WiFi only iPads do not. It is possible to hook up a WiFi only iPad to an external, bluetooth, GPS device like the Garmin GLO 2. Tethering a WiFi only iPad will offer you an internet connection but GPS location isn’t provided via the tether.
- Certain Live app features require an active data connection. Sharing live locations, viewing or adding new waymarkers, weather information. SIM cards (eSIM or real) are very cheap for data and are often relied upon in a cellular iPad to help with your location. Having a SIM card installed in the device is the recommended setup. You can also tether to your phone to access the internet that way but bear in mind that if you are using an Cellular iPad, it may still need a SIM card installed for location to work as expected.
Recommended devices
- Power user: e.g. DS, UCI Commissaire, Race Safety Officer – Cellular iPad or Android tablet.
- Size wise, anything from iPad mini to iPad PRO. The iPad PRO can allow you to run the Live app side-by-side with another app. Whatever suits your method of use and where you are positioned in the car.
- Often mounted to dashboard or back of headrest if sat in the back of a car. Or handheld if using the device for all of your tasks.
- Others: e.g. Soigneurs, VIP/Doctors/Broom wagon drivers – Any phone or a GPS enabled tablet (if you would like a larger view) will work for you.
- Note that your live location will only be shared while the Live app is running. Once the Live app goes into the background, the location sharing is paused. Unfortunately there is no way to keep this running in the background.
- Motorbikes: The Live app is used by police, marshals, TV, photographers and Regulators. You have two main options for how you run the Live app on a motorbike:
- Have a phone mounted on the handlebars. You will need this to be charging. The “Compact mode” setting will be useful for this setup.
- Using a rugged Android tablet that people use for touring. This would need to be a complete Android device, not just a screen that you CarPlay / Android Auto to from your phone. CarPlay and Android Auto will not expose the Live app to the screen.
Main pages
- Main menu: This will show green buttons for races that are happening on that day. Also buttons to open the Route List and Settings page. The “Reload app” button at the top left will perform a refresh and can be done (when on a good internet connection) to pick up a newly released update if needed. At the top-middle there is small text that shows the version of the app you currently have installed. If you belong to multiple Race Hubs on VeloViewer, you will be shown a dropdown below the VeloViewer logo. Races and waymarkers will be in the context of the selected organisation.
- Route List: The list of Race Routes that are linked to organisation’s Race Hub that have routes. Press this button to select a route that is for a future date. The Route List page also has an “Update List” button that can be pressed to force a refresh of all the route information, which can be needed if there is a very late change to a route. The Live app will periodically check for route updates automatically so you might not ever need to perform a manual update of the list.
- Settings: All of the options for the Live app as described on the Settings help page.
- Race route: The details of the selected race as described in detail below.
Race route features
Top tip: If the Live app doesn’t have you at the correct distance in the race (usually only an issue when there are lots of laps), tapping the bottom elevation profile will show a popup showing the different distances you could be based on your current location, including “heading to start”. Just pick the correct distance. If you choose “Heading to start”, when you pass through the start of the route, it will automatically begin tracking your place along the route.
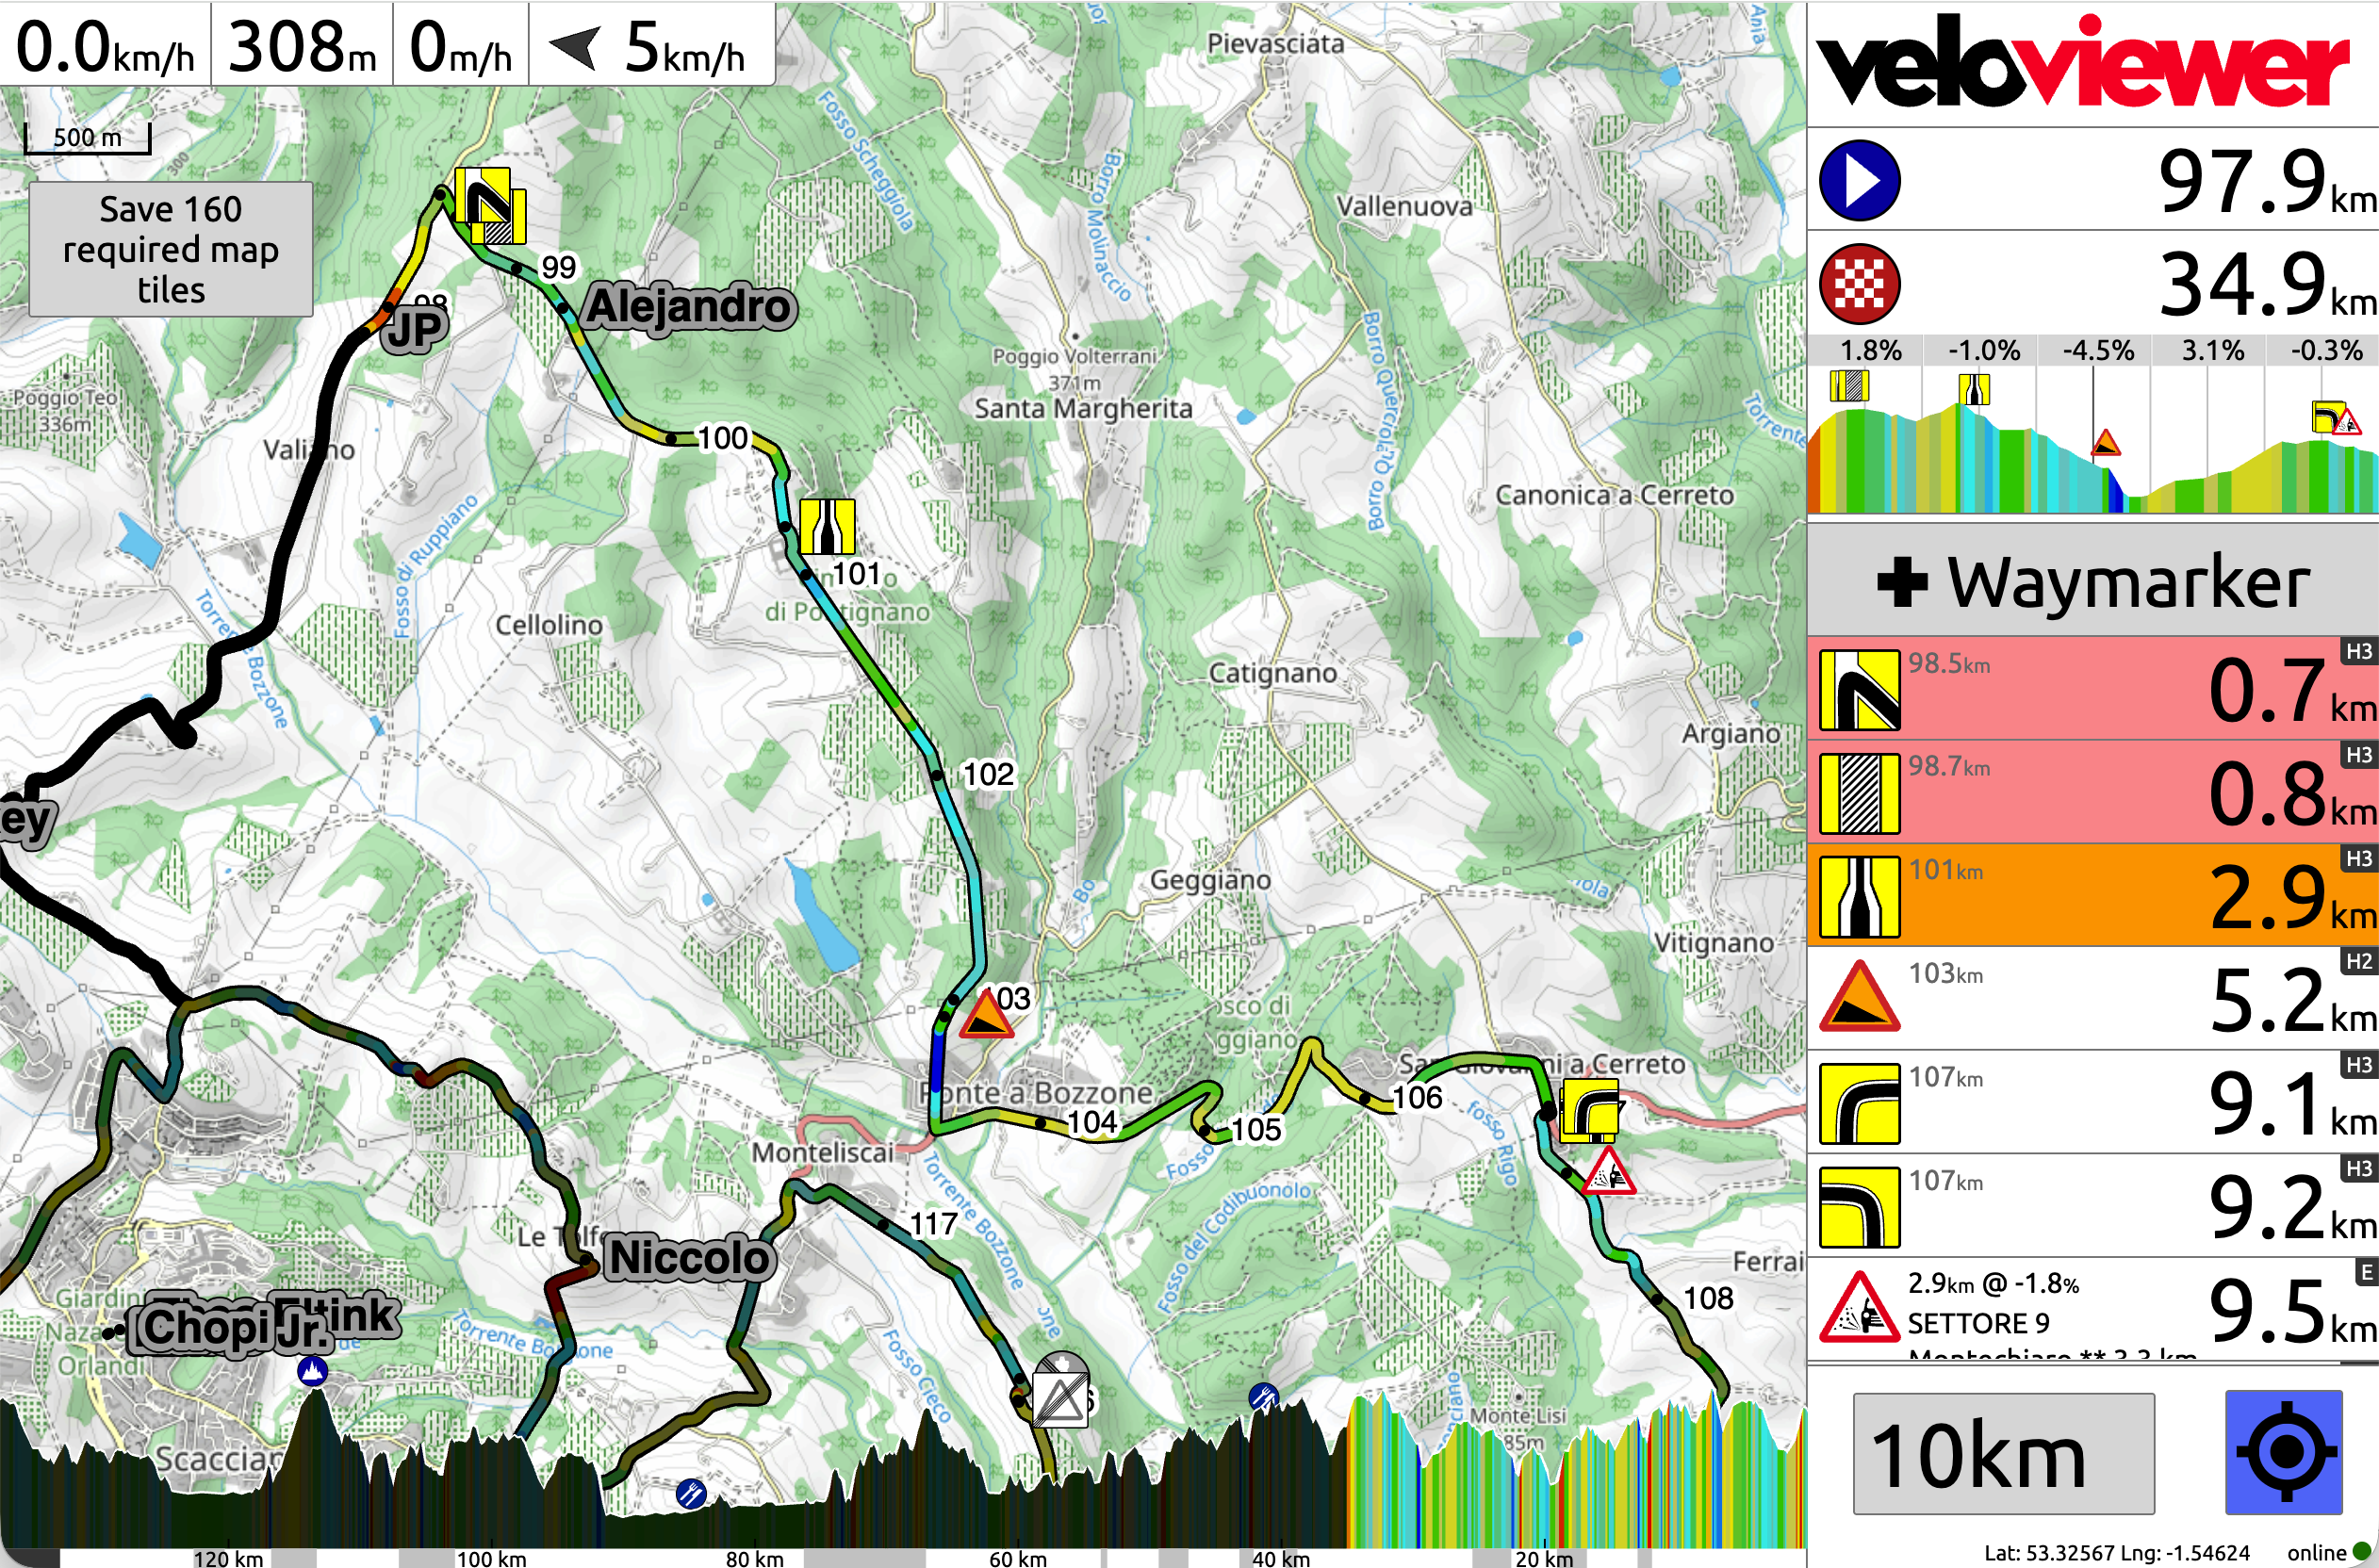
Starting at the top right and going clockwise:
- VeloViewer logo. Takes you back to the main menu.
- Distance to (if still in neutral) or from km zero. Tip: pressing this or the two items will hide the route line on the map so you can see the size of the roads.
- Distance to finish.
- Upcoming elevation profile showing the current “zoom distance”. Average gradients of dynamic sections of this upcoming profile along with waymarker locations also shown.
- ✚ Waymarker button. Only shown when in “recon mode”. For full info on adding/editing waymarkers please see the full recon mode help.
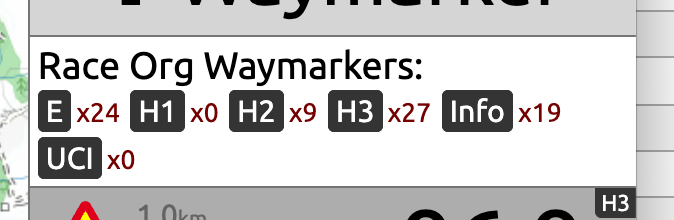
- At the top of the waymarker list (you may need to scroll to the top) is the “Race Org Waymarkers” filters. Tap on this and you will see a popup that allows you to toggle off/on each “level” of waymarkers.
- List of waymarkers with current distance to each waymarkers’ location. While you have an internet connection, the Live app will check for new/updated/deleted waymarkers once every minute.
- More than 5 km away – white background.
- Less than 5 km away but more than 2km – orange background.
- Less than 2 km away – red background.
- Behind you – grey background.
- Image will be based on waymarker type, options and colour.
- If a “wind” waymarker, expected wind direction/strength image will be shown.
- Length to end waymarker (if applicable) along with waymarker notes.
- Level of waymarker (for Race Organiser waymarkers only) shown in the top right of each item.
- Tapping a waymarker item will open a popup showing full information (and potentially allow editing/deleting if in “recon mode”).
- Target toggle button. When enabled, the Live app will follow your location. If you pan/zoom the map, after 10 seconds it will snap back to its default view based on your location. If this toggle button is unchecked, then the map doesn’t snap back allowing you to examine the course more easily.
- Zoom distance drop down. Defaulting to “Full” to show you the whole race route, picking other values will auto-zoom the map to show that distance of the route ahead of your current location. This also dictates the amount of the course shown in the upcoming elevation profile area described above.
- Small but important, in the very bottom-left you will see a green/red circle along with online/offline text. This will show whether the Live app currently has an active internet connection.
- Lat/Lng values. These two values will demonstrate that the Live app currently has access to your location. If it is showing “Permission error” or some other text, then please see the troubleshooting section on the install guide.
- Bottom elevation profile.
- Coloured by the gradient.
- Shades in black as you progress along the route.
- Distance scale can be shown counting up form km zero or down to the finish (see “reverse distance scale” setting).
- Grey shaded areas in the distance scale show sections of pavé or gravel marked with the appropriate waymarkers.
- Climb, sprint and feed waymarkers are shown above the profile.
- Tapping the profile will let you select your distance into the race route (see the “top tip” above).
- Live rider tracking when available is shown on the left of the screen.
- Save [n] required map tiles button.
- Map scale.
- Current speed/elevation/VAM/wind area. Tapping this opens the route info / time-cut popup described below.
- Map zoom buttons. Only displayed if the “show map zoom” setting is selected.
- Map rotate button. Only shown if the “map direction” setting is not set to “north up”. Pressing the button spins the map to North up, but after 10 seconds it will spin back to your chosen direction.
Route info/time-cut popup